
Without completely overexposing the subject, in this article, we’re going to dehaze and add some clarity to our raw photography. With the help of snippets from our “A RAW Conversation” webinar with McKenna Sponsored Photographer, Josh Russell, we’ll reduce the noise, sharpen our skills, and add a bit of color to our RAW workflow. Ok, enough with the photography puns, let’s get into it.
So, why do most professional photographers shoot RAW? The simple answer is that we want to edit them. For decades film photographers manipulated their negatives and prints in darkrooms. So, why would digital photographers be any different in Adobe Lightroom and Photoshop?
JPGs vs. RAWs
Let’s imagine for a moment that you’re photographing a celebrity or a beautiful sunrise on location. Determining which file format is better for you depends on your needs. Maybe you prefer to have a higher quality image (RAW) or a standard JPG. In this specific case, I (Eric) would probably shoot both formats (JPG + RAW). Here are a couple of reasons why:
If one file is corrupted or didn’t save correctly to the card, the next best thing is a duplicate (even if it’s smaller or of lesser quality). Some cameras even allow you to shoot JPGs and RAWs on separate cards. This helps if you lose a card or it gets damaged.
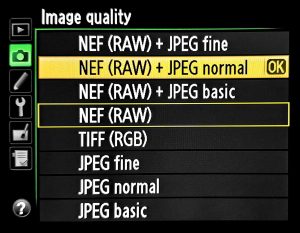
Remember, JPGs are great for immediacy, previewing images, and reduced file sizes, but RAWs have the upper hand. If you’ve ever shot film, you expose for the shadows, but for digital, we expose for highlights. This is key to remember because if we’re shooting JPGs and overexpose our images, we will lose detail in the highlights. This might be difficult to recover in post. However, if we over or underexposed our RAWs, we can easily recover detail in the highlights and shadows with a click of a button. Color depth is also superior in RAW files due to their higher bit depth. All JPGs are limited to an 8-bit capture. Most Canon, Nikon, and Sony cameras allow for 12 to 15-bit RAW files, but some professional cameras have true 16-bit RAW file captures.
To learn more about bit depth, please watch our McKenna Live webinar “How Accurate Is Your Color” (minute 11:33).
RAWs In Lightroom Classic With Josh Russell
Paul Kestel, McKenna’s Business Development Manager, and I sat down with portrait and wedding photographer, Josh Russell, to talk about his RAW workflow in “A RAW Conversation“. If you are unfamiliar with Josh’s work, check out his website.
Josh walked us through his process in Lightroom with one of his captivating images. He started in the Basic module and then worked his way into colorization for the overall artistic look of the image. His strategy works well because lighting comes first. By bringing up the shadows, adjusting the blacks, and increasing the contrast of the RAW image, he was able to regain shadow detail without creating unexpected or erroneous visual elements known as artifacting. From there he bumped up the vibrance and adjusted the highlights.
Masking in Lightroom:
The benefits of masking allow for precision and control. Thankfully, Lightroom is a non-destructive and seamless process for adjusting targeted areas. In the webinar, Josh stated the following about masking:
“Masks are a huge part of my workflow. So, I use masks on everything. When I first started using these masks, that’s when my artwork really started changing, and because once again, I’m using RAW, I’m able to do stuff like this.”

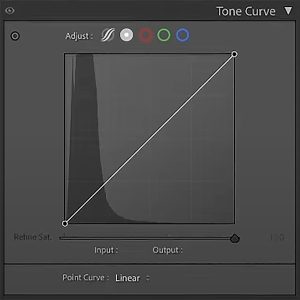
Tone Curve
You might be familiar with the Tone Curve tool. Not only can it change the overall tones of the image, but you can change the colors individually as well. If we took it one step further, we could combine a tone curve with a masked area to strategically target the tone or color of that area.
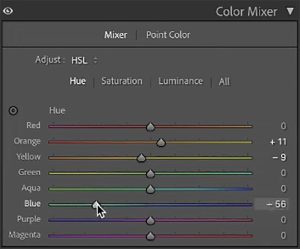
Color Mixer
This powerful tool allows you to choose how much individual color per channel is in the photo. Josh explained that Lightroom Classic has two main modes: HSL and Point Color. After changing it to his preferred mode, he stated that HSL (hue, saturation, luminance) allows for greater separation and achieves better results. For this specific photo, he adjusted the hues of individual colors.
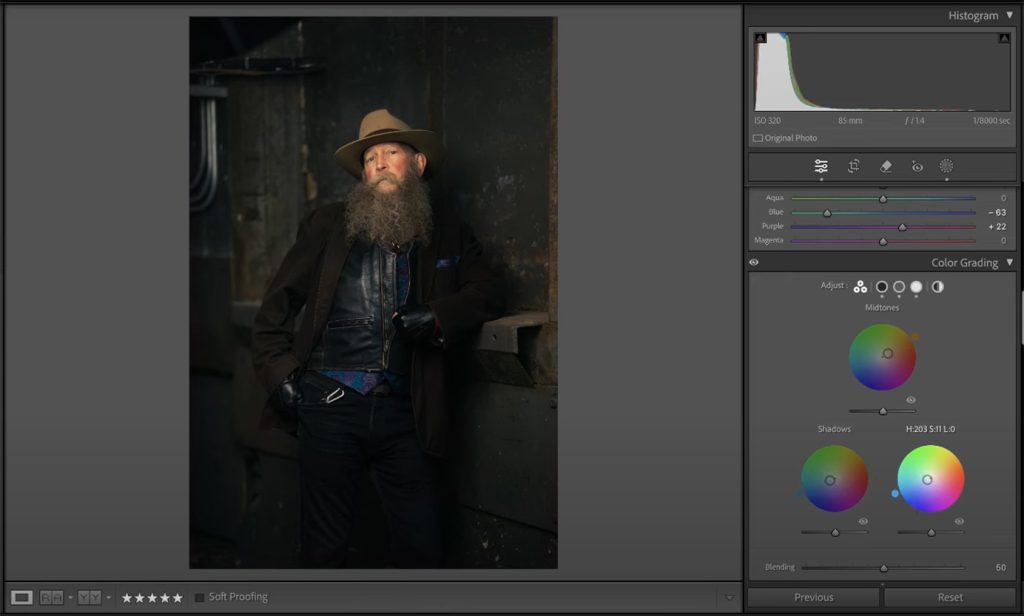
Color Grading
Filmmakers popularized color grading, but in the earlier film processing days, color grading was referred to as color timing. This digital post-production tool changes the mood of the image by enhancing the colors and tones.
Josh adjusted the shadows, midtones, and highlights ever so slightly to get the orange/teal look he was looking for. In Josh’s words, “This is where you create your ‘look’, your ‘style’. A little bit goes a long way.”
Interested In Learning More?
Whether you shoot RAW or JPG files, editing your images in Lightroom is a straightforward and non-destructive process. For more instructional content like this, please subscribe to McKenna’s YouTube Channel or book a free one-on-one coaching session with me, Eric Garcia-March.
This blog was written by Eric Garcia-March, our in-house Photography Education Specialist and host of our McKenna Live webinars. Prior to McKenna, Eric was a commercial photographer for over 15 years and taught classes at the Image Processing and Multimedia Technology Center in Spain as well as post-production classes at the Fashion Institute of Technology in New York City.